ProxyAdmin+UltraVNC Installation and usage instructions for remotely achieving intranet penetration and accessing intranet computers
Original link: https://www.itylq.com/proxyadmin-ultravnc-access-intra-computer.html
Release date: 2024-12-15 Migration time: 2026-03-21
1 Demand Goal
Through the intranet penetration method, you can remotely access the intranet computer desktop in real time and complete common operations.
2 Preparation tools
- 1 VPS (Linux system);
- ProxyAdmin, UltraVNC software;
- 1 intranet host (Windows system).
3 Main ideas
- Install and run ProxyAdmin on the VPS and enable intranet penetration monitoring;
- Run and configure ProxyAdmin on the intranet host as the intranet penetration client;
- Install and run UltraVNC on the intranet host to remotely map the local desktop Web service to the VPS;
- Remotely control the desktop of the intranet host by accessing the corresponding mapped port of the VPS.
4 Detailed configuration
1.VPS side:
(1) Install the ProxyAdmin application. For details, see the official documentation, omitted.
The default account password is root/123; the login address is: http://
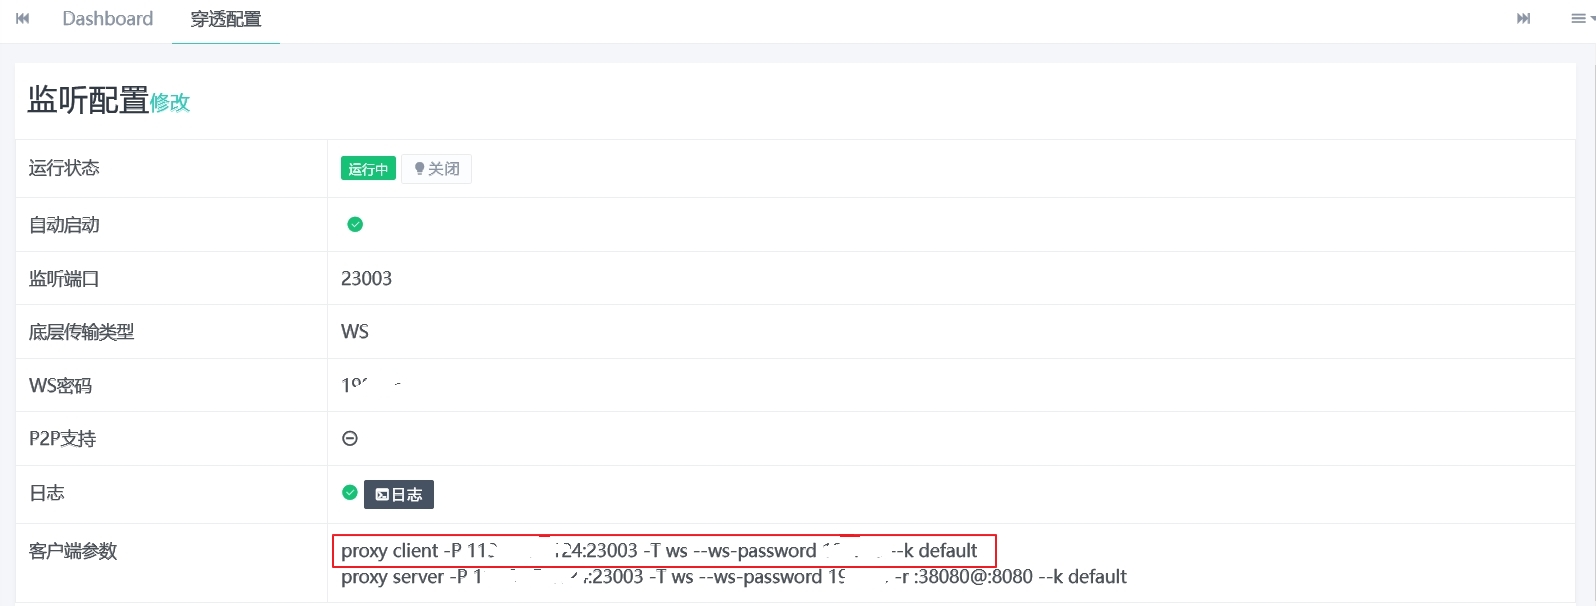
(2) Modify the intranet penetration monitoring configuration (the listening port is customized to 23003) and enable the service.
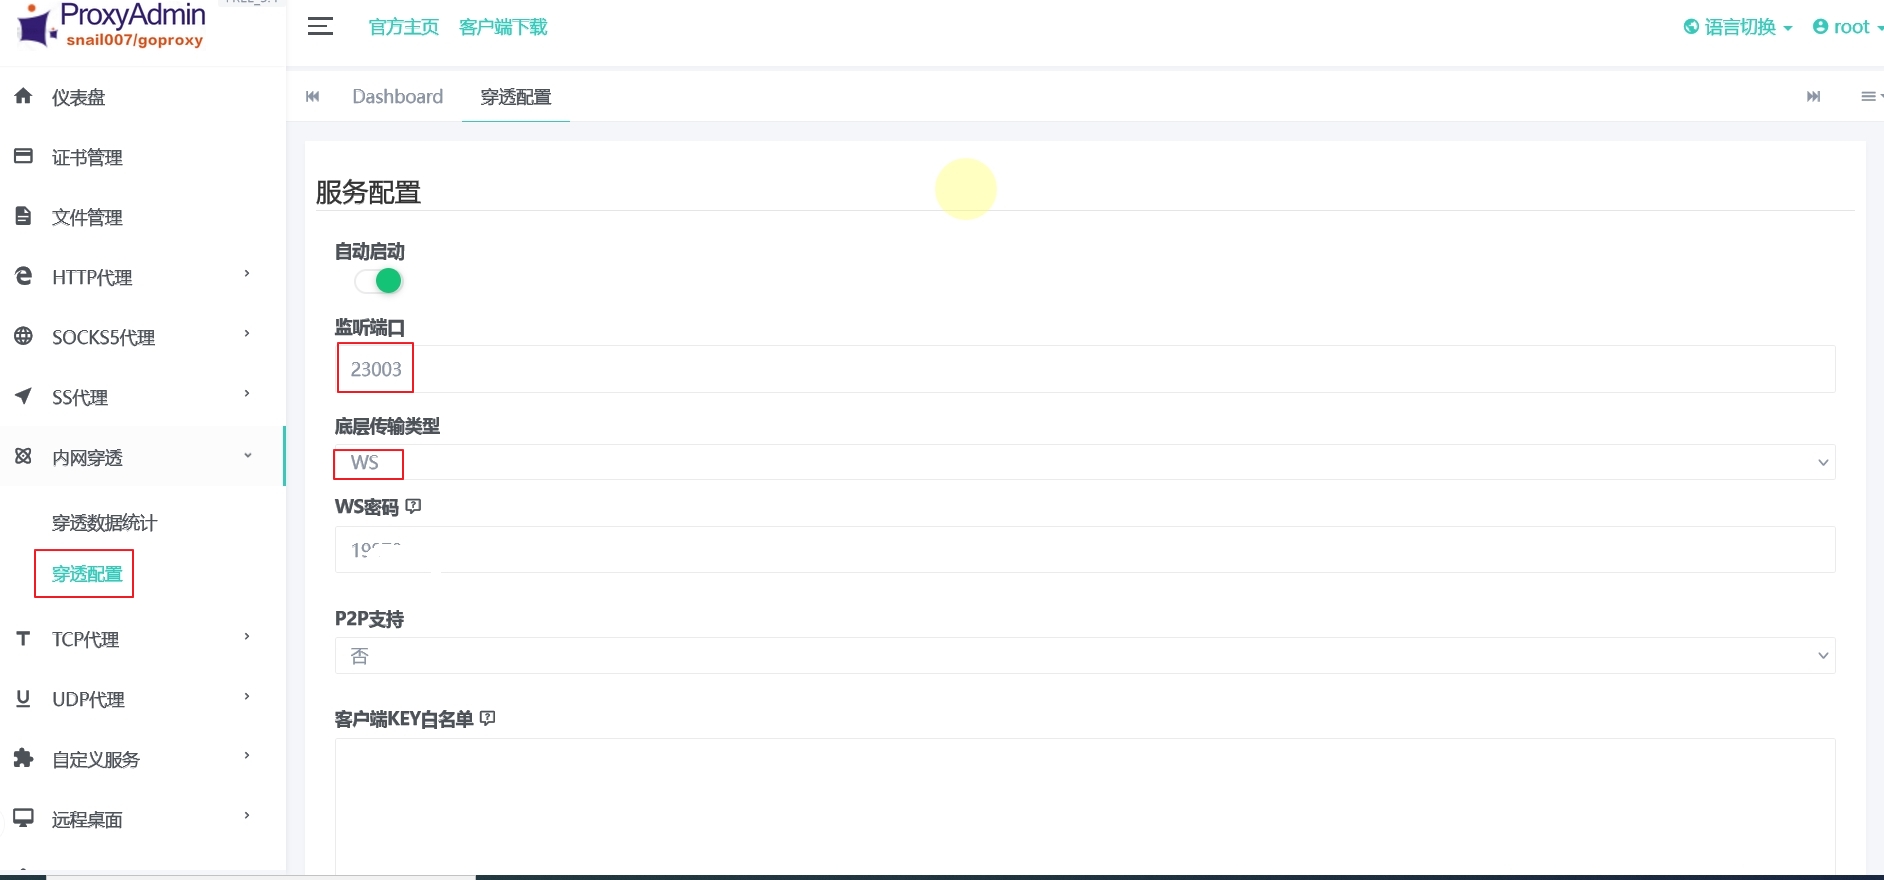
After confirming the save, copy the client connection information in the "Client Parameters" column and temporarily save it to any file. This connection information will be used when configuring the intranet host later.
(3) Add and enable port mapping. VPS:23004<=>Local:23004.

Setting the listening port to 127.0.0.1:23004 will be more secure, but you can only remotely access the intranet host through the ProxyAdmin application interface; if it is set to VPS public network IP: 23004, you can log in through IP: 23004 in any browser.
2.Intranet host:
(1) Download and decompress the ProxyAdmin Windows version and install UltraVNC;
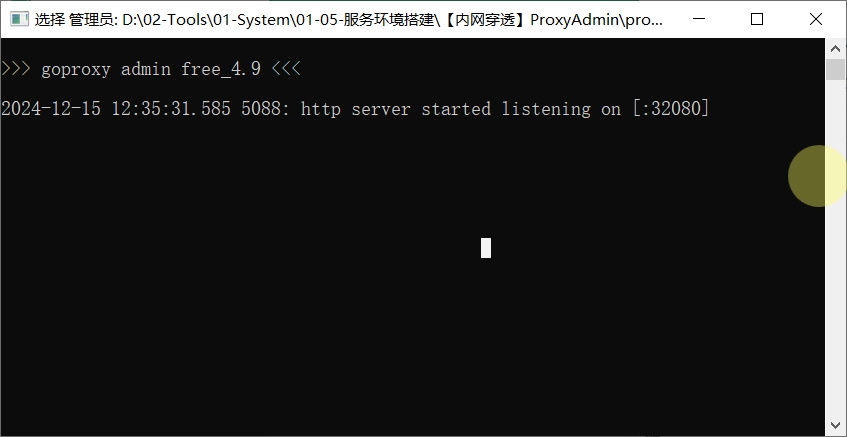
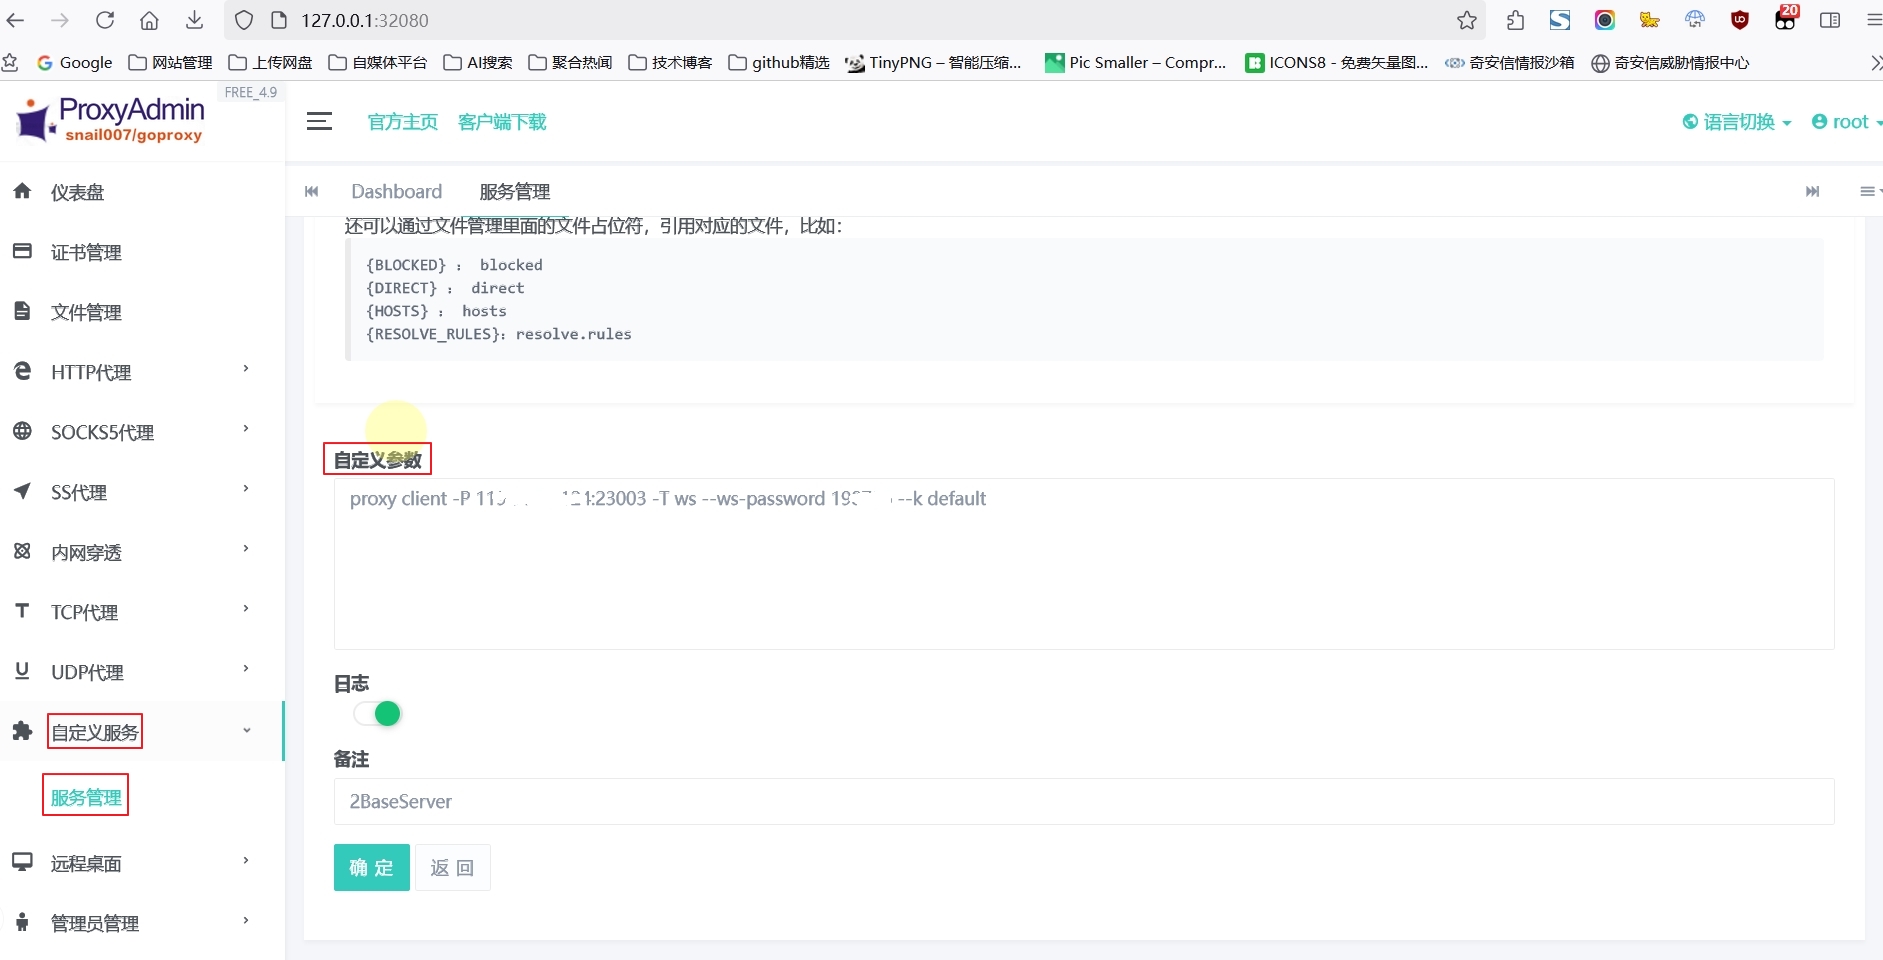
(2) Double-click Proxy-admin.exe to start the ProxyAdmin service, and also log in to the local configuration background through port 32080;
(3) Click "Custom Service" - "Service Management", create a new one, paste the previously saved client connection information into "Custom Parameters", turn on the log function, confirm and return to enable the service.
(4) Open "UltraVNC Server Configuration", modify the RFB and HTTP port numbers (which must be consistent with the port numbers in the VPS port mapping configuration), and set the VNC login view password.
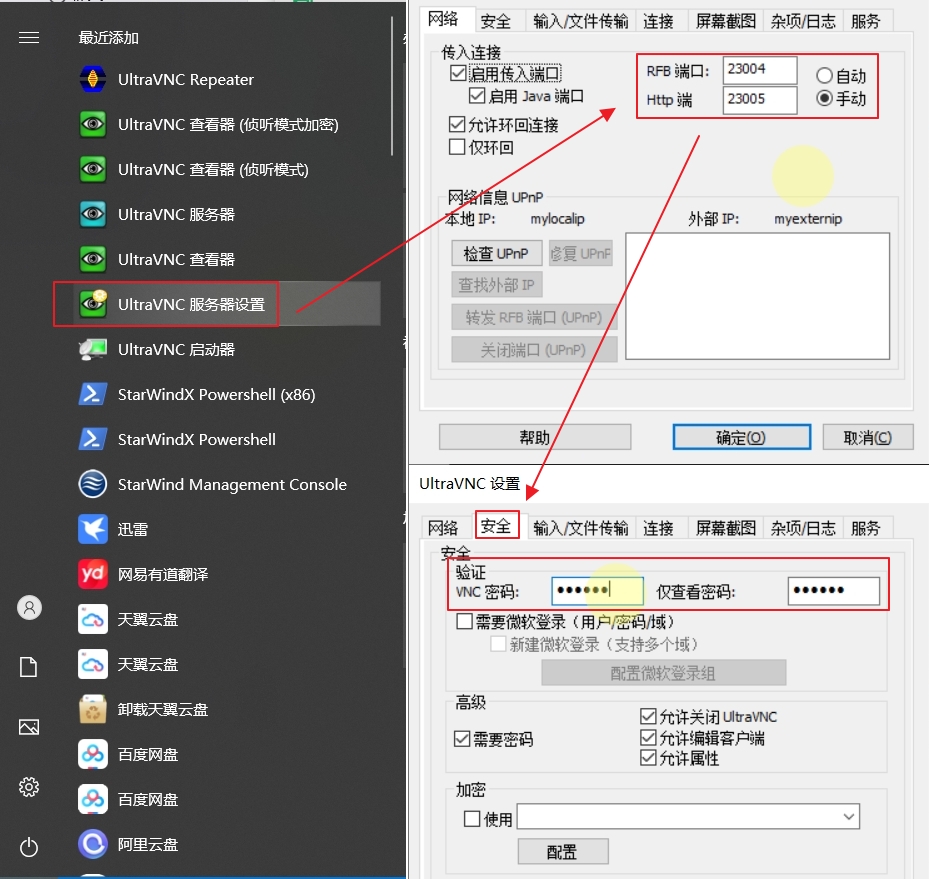
Finally, use the Telnet command test to verify whether the intranet host and VPS have released the relevant TCP port numbers to ensure normal communication between them.
5 Verification
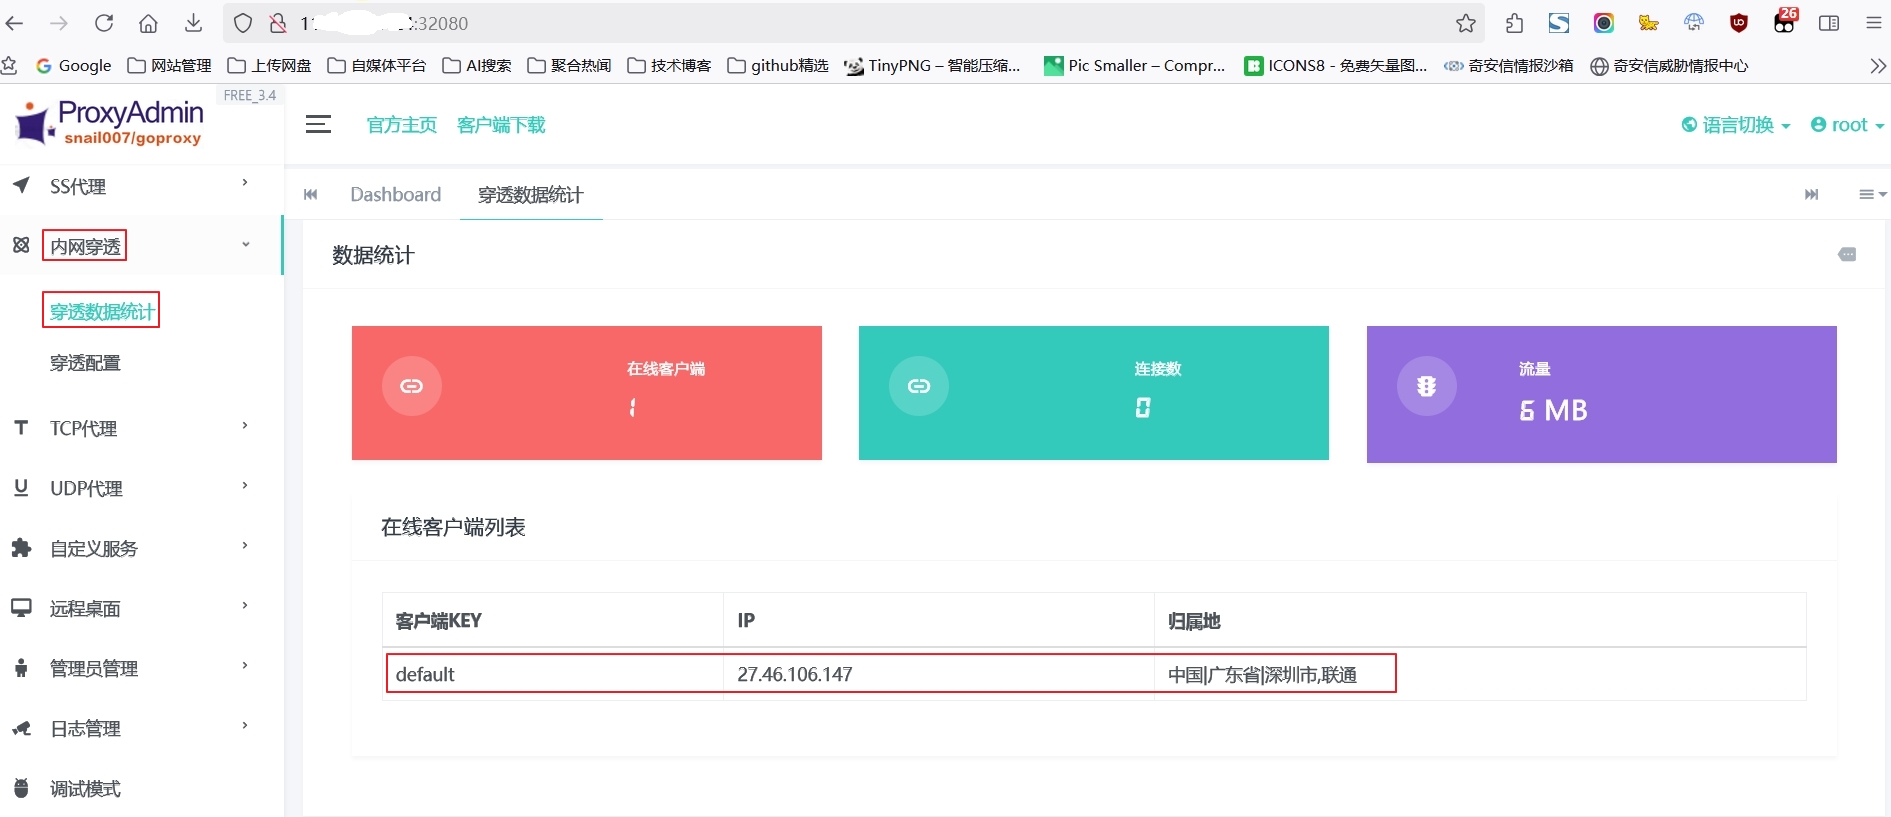
Log in to ProxyAdmin on the VPS and view the intranet penetration statistics panel. You can find that there is already client connection information and the intranet penetration channel has been successfully established.
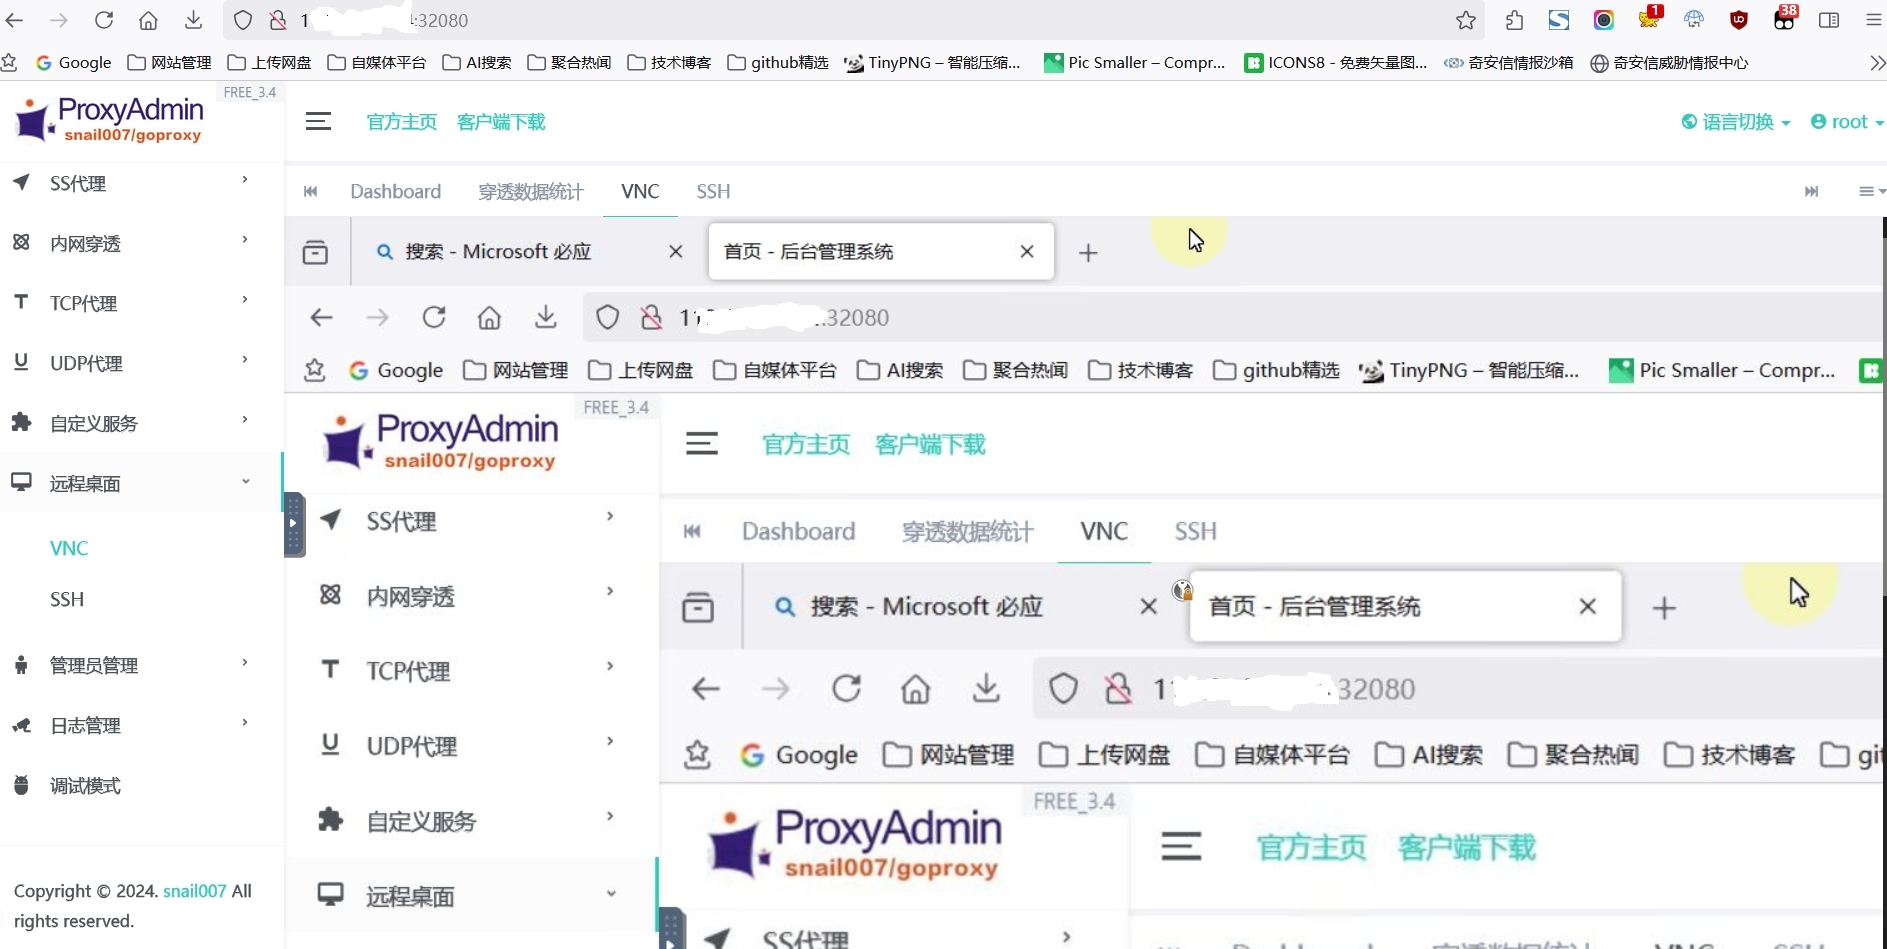
Click "Remote Desktop" - "VNC", enter "127.0.0.1", "23004", and then enter the VNC login password in the pop-up verification window to successfully access the intranet host desktop.
This article was moved from WordPress to MkDocs