Qunhui NAS system uses FRP open source tools to achieve intranet penetration practice record (1)
Original link: https://www.itylq.com/frp-tech-in-synology-nas_1.html
Release date: 2022-09-17 Migration time: 2026-03-21
I have a Qunhui DS1019+, which has super large capacity, gigabit speed, and can turn into a home theater in seconds. It is really fun to use locally. But how can we successfully use the Qunhui system in other places or in the company? The quickconnect provided by Qunhui itself is unbearably slow, and third-party tools such as Sunflower are eager to attack my wallet (don't even think about free functions, there are various restrictions)... It is impossible to spend money, and free is not appropriate. I thought that there is an ECS in IDC used to host blogs, which can be used just right.
FRP is a free open source tool developed by FateDier, a famous domestic expert. It focuses on high-performance reverse proxy applications for intranet penetration and supports multiple protocols such as TCP, UDP, HTTP, and HTTPS. Intranet services can be exposed to the public network through transit with public network IP nodes in a safe and convenient manner. It has been widely used in testing and production environments by many companies.
1 FRP working principle
Before starting work, let’s briefly understand the principle of intranet penetration:
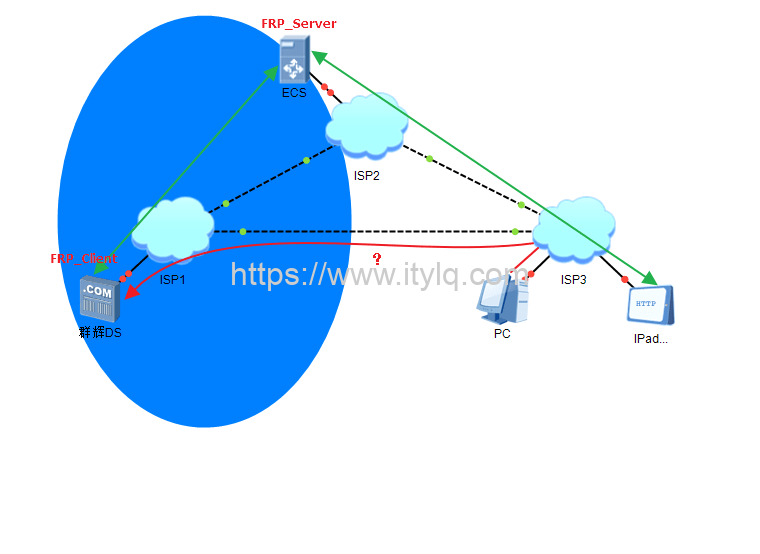
ISP1: home network;
ISP2: IDC network;
ISP3: Office networks in other places and companies.
Computers, IPads and other mobile terminals within the scope of ISP3 need to access Qunhui DS within ISP1. In theory, it is most convenient to access it through the red link in the picture above. Unfortunately, because most home broadband does not allocate a fixed public IP, this route is not accessible.
Because the server in ISP2 is specially used by IDC to build websites, APPs, etc., it has a fixed public IP and can provide services to the outside world. However, due to storage space size restrictions and cost issues, generally the ECS storage space in ISP2 is very limited. At this time, a certain technology is used to "hook" the storage space of ISP1 to ISP2's ECS, or to "point" the storage location/storage address on ISP2's ECS to the Qunhui DS in ISP1. This not only solves the need for external network access to data at any time, but also solves the problem of limited ECS storage.
At this time, for devices within the scope of ISP3 (external network users), the ECS in ISP2 is communicating with it, and ISP1 is not visible. Between ISP1 and ISP2, a stable and reliable data transmission mechanism at both ends is established based on the C/S mode of FRP, which can be logically regarded as a whole.
2 Server-side installation and configuration of FRPS (FRP Server)
First check to determine the server system version, and download the corresponding version of the FRP tool kit from Github. Each tool kit contains the Server side and the Client side.
For Centos|Debian|Ubuntu (32/64-bit) systems, you can install it online through the following command:
wget https://raw.githubusercontent.com/MvsCode/frp-onekey/master/install-frps.sh -O ./install-frps.sh && chmod 700 ./install-frps.sh && ./install-frps.sh install
Switch to administrator privileges, copy the above command and press Enter, and the automatic installation will begin. In the interactive interface, generally default or enter the "1" option. If there are other applications on your system that occupy the port, there will be a port conflict prompt. Remember to modify it.
Remember the values of frps Dashboard, Dashboard user, Dashboard password, token, vhost http port, vhost https port, which will be used later.
Finally, the following summary information will be output, and the server-side installation is completed.
Congratulations, frps install completed!
================================================
Your Server IP: 211.149.141.94
Bind port: 5443
KCP support: true
vhost http port: 90
vhost https port: 91
Dashboard port: 6443
token: abc123456 # The default is a string in the shape of abc123456, which can be customized
subdomain_host: 211.149.141.94
tcp_mux: true
Max pool count: 100
Log level:info
Log max days: 3
Log file: enable
================================================
frps Dashboard: http://211.149.141.94:6443/
Dashboard user:admin
Dashboard password: abc123 # Customizable
================================================

frps status manage : frps {start|stop|restart|status|config|version}
Example:
start: frps start
stop: frps stop
restart: frps restart

# The configuration file and frps binary file directories are in /usr/local/frps
The above configuration information is stored in the /usr/local/frps/frps.ini file. If necessary, all configuration items can be modified through the vi /usr/local/frps/frps.ini command.
3 Server side verification
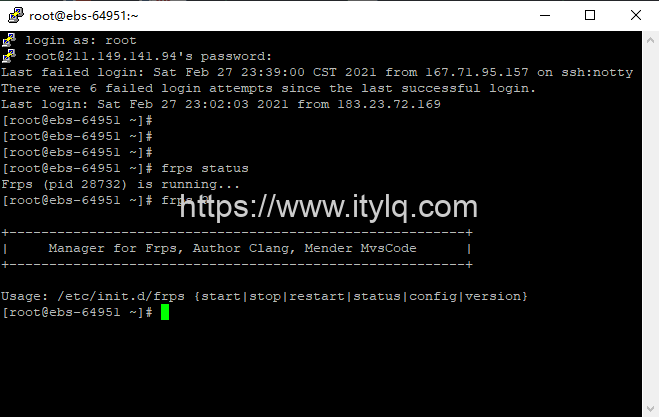
- Check the FRPS running status:
frps status
# In addition to viewing the current running status, it also supports:
frps {start|stop|status|config|version}
- View the FRPS Dashboard web page:
Copy the frps Dashboard in the previous summary information: http://211.149.141.94:6443 to the browser, enter Dashboard user and Dashboard password, you can see the following page:
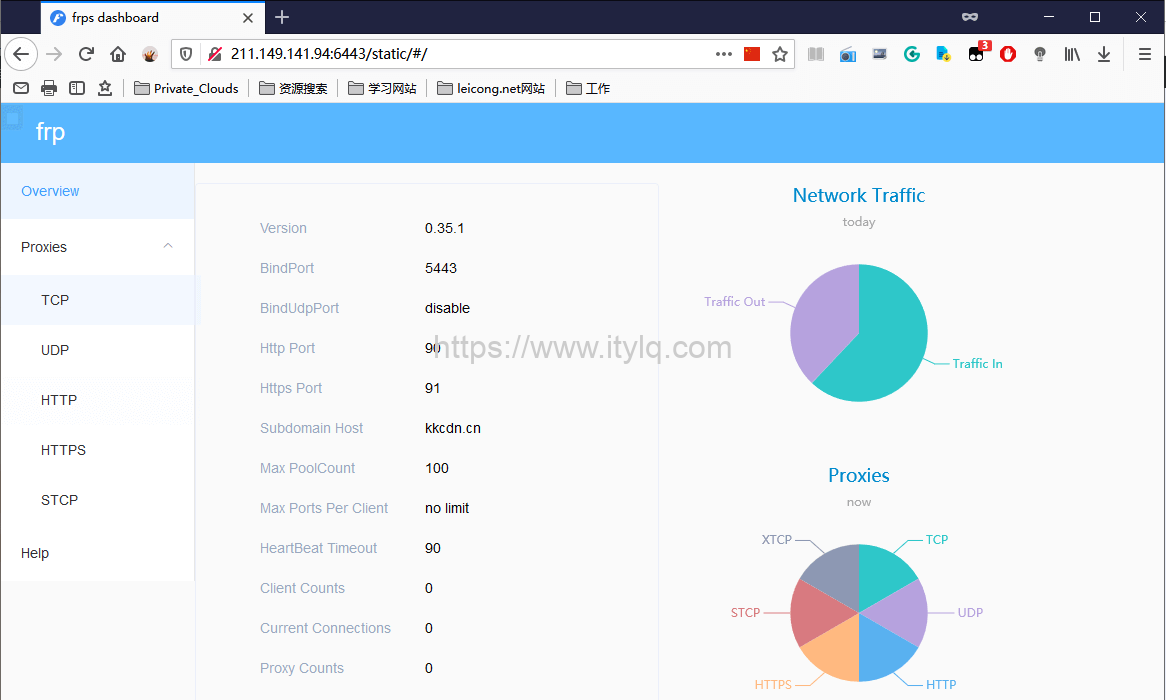
At this point, the configuration of FRP on the server side ends.
This article was moved from WordPress to MkDocs